Quick reply
This section allows agents to create quick replies so they can respond to users more efficiently, without wasting time typing the same message over and over again.
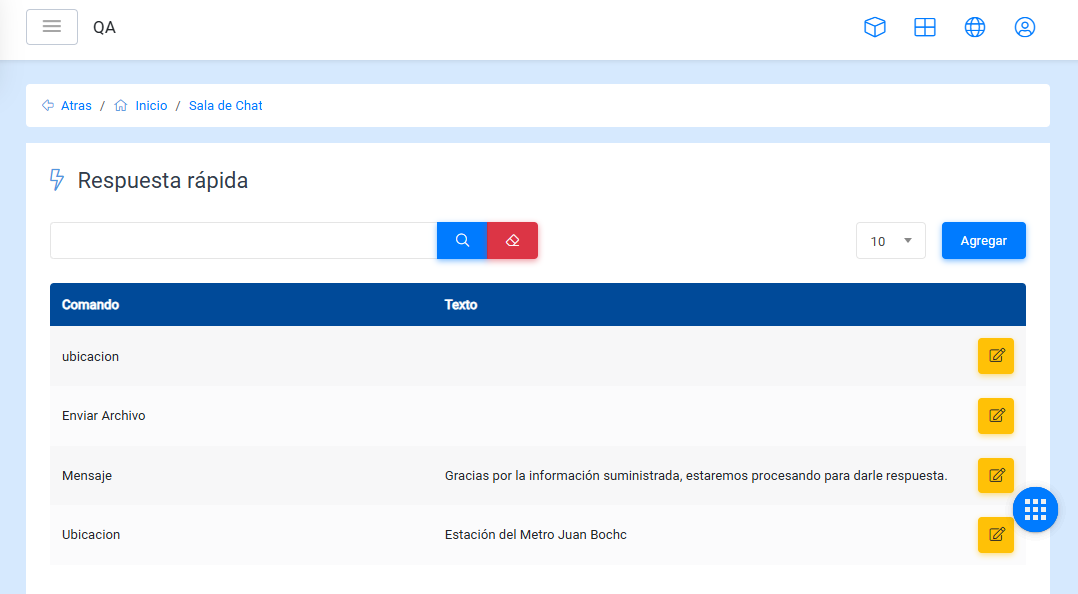
The table shows the following fields:
- Command: indicates the name of the quick reply when it is going to be used.
- Text: indicates the text or message contained in the quick reply.
- Options: indicates the actions that can be performed for each quick reply.
Create quick reply
To create a quick reply, click the Add button. The following screen will be displayed:
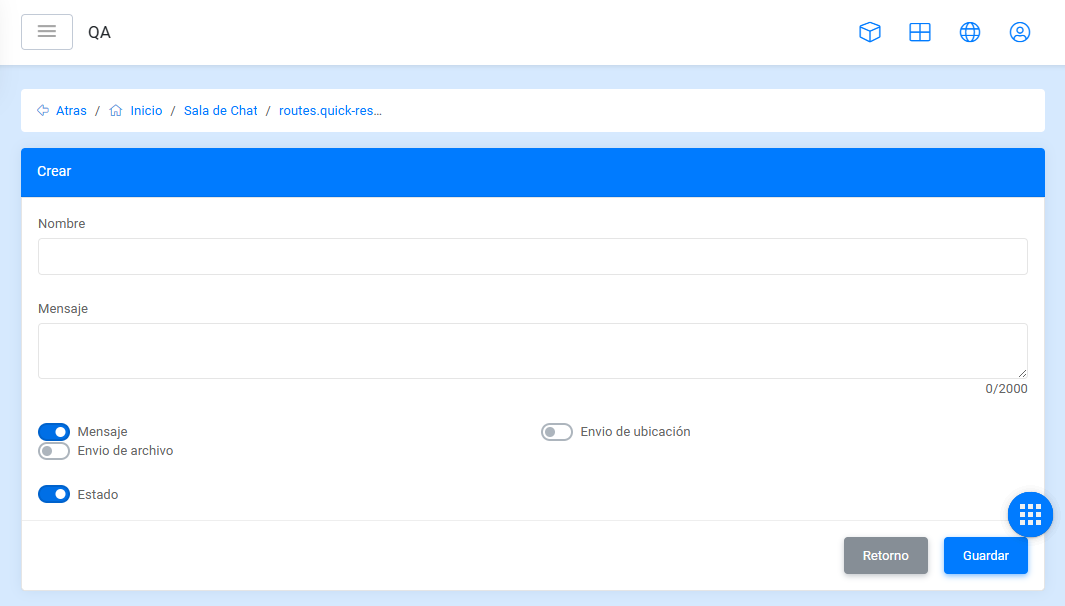
This screen contains the following fields:
- Name: indicates the name that the quick reply will have.
- Message: indicates the message that will be shown to the user when it is sent.
- Message options: this section has 3 options to indicate whether they are special messages. These options are:
- Message: indicates that it will only be a text message.
- File upload: indicates that a file will be sent to the user.
- Location send: indicates that a specific address or location will be sent to the user.
Update quick reply
To update a quick reply, click the Options button. The following screen will then be displayed:
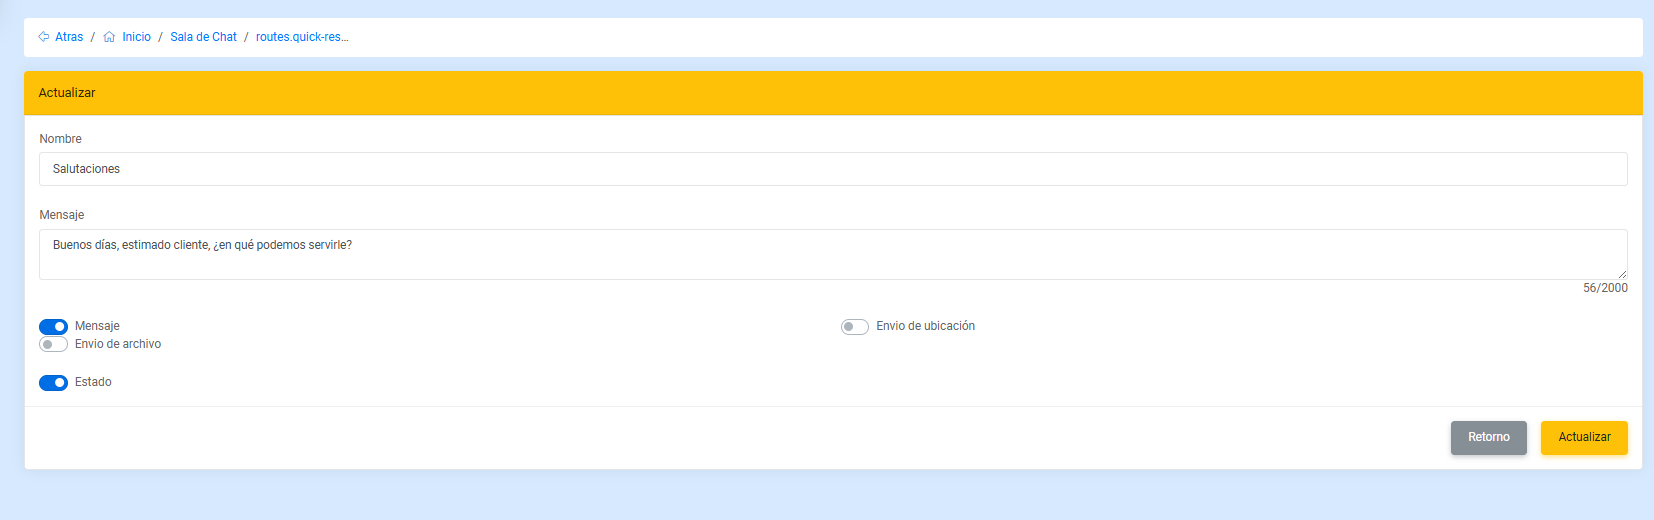
You only need to change the values that require modification and click the Update button.
Considerations
To use the options indicated in the Create quick reply and Update quick reply sections, you must specify the file or address you want to send to the user.